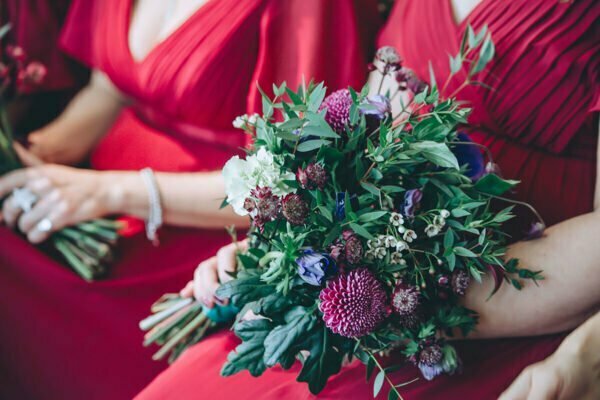
How to preserve wedding bouquet
How to Preserve a Wedding Bouquet: Top Methods and Tips
Are you wondering how to preserve a wedding bouquet? This comprehensive guide covers everything you need to know, from simple DIY methods to professional services, ensuring your wedding flowers become a lasting keepsake of your special day. Choose a flower preservation style based on cost, quality desires, and sentimentality. Explore various preservation methods like air drying, freeze drying, and resin to find what fits your style best. Getting creative with display ideas, shadow boxes or resin art will transform your preserved flowers into stunning décor pieces. By preserving your wedding bouquet, you can relive the emotions and joy of your big day for years to come!
DIY vs. Professional Bridal Bouquet Preservation
Deciding between DIY and professional wedding flower preservation is one of the first steps you’ll take. Each option has its pros and cons, influenced by factors like cost, desired quality, and personal preference.
DIY preservation can be both enjoyable and economical. Popular methods include air drying and using silica gel, often found in DIY flower preservation methods kits. Though accessible, DIY results may not always meet the high standards of professional services, and material costs can accumulate.
Professional flower preservation services, starting around £150, offer more reliable and polished results. Expert preservation artists ensure your bouquet is kept in optimal condition, providing a timeless keepsake. Additionally, choosing a preservation artist can offer more personalised and creative options.
Ultimately, the choice between DIY and professional preservation hinges on your desired outcome and the sentimental value of the flowers. If crafting and cost-saving appeal to you, DIY might just be a better option. For a flawless and enduring keepsake, professional services may be worth the investment. Consider your personal preferences to ensure your bouquet remains a cherished memory.

Top Methods for Preserving Wedding Bouquets
Preserving your wedding bouquet can be achieved through various methods, each with its unique process and outcome. Whether you’re looking to preserve flowers through air drying, silica gel, freeze drying, resin, wax dipping, or pressing, there’s a method to suit every bride’s preference and skill level.
The aim is to maintain the beauty of your bridal flowers, transforming them into a lasting memento of your special moment. Here are the top methods for preserving wedding bouquets to help you decide which one suits you best.
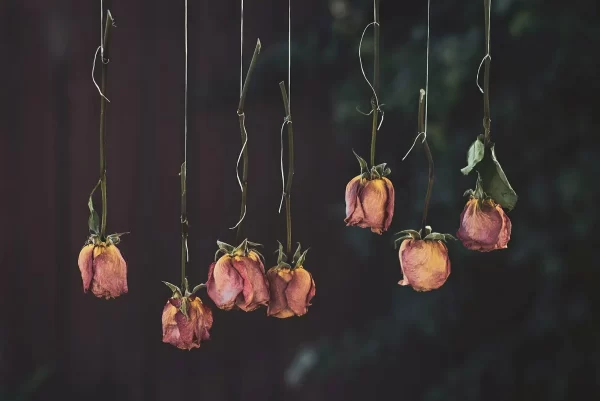
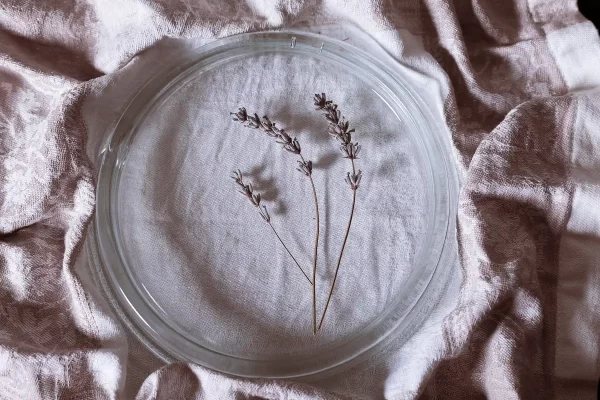
Air Drying Your Wedding Bouquet
Air drying is a traditional and straightforward method. Hang the actual flowers upside down in a cool, dark place to let the flowers dry naturally. Ensure the flowers are healthy and moisture-free to avoid mould, remove unwanted leaves, and cut stems at an angle. The drying process take around 2-3 weeks.
Securely tie the stems with string or twine and hang the bouquet in a well-ventilated area out of direct sunlight. For faster drying, place a desiccant nearby without direct contact with the flowers. Check periodically for dryness, as the process can take several weeks.
Air drying is a simple yet effective method for drying flowers, resulting in beautiful dried blooms ready for creative displays. With patience and care, you can turn your bouquet into a lasting keepsake of your special day.
Using Silica Gel to Preserve Flowers
Silica gel is a popular method for at-home bouquet preservation, maintaining the flowers’ natural appearance by absorbing moisture. Submerge the flowers in silica gel for complete coverage and leave them in an air-tight container for one to seven days. This method effectively preserves the shape and colour of the blooms.
For better results, separate flowers into groups of similar sizes. Once dry, gently remove them from the gel and spray with artist-fixative or hairspray to maintain their appearance. While silica gel prolongs their beauty, it won’t keep them perfect forever; the goal is to extend their aesthetic life just a little longer!
This technique can be rewarding, capturing the essence of your wedding day with this beautiful wedding flower preservation style. With the right materials and some patience, you can create stunning dried flowers that serve as a lasting reminder of your special moment.
Freeze Drying Wedding Flowers
Freeze drying is a highly effective method, preserving the flowers’ natural texture and shape through sublimation. This involves freezing the flowers in a special machine and then removing moisture while retaining their original form. A key benefit is that it keeps the flowers looking as fresh as the day they were picked. Freeze dry flowers technology enhances this preservation process.
However, due to the equipment needed freeze drying can be costly, which might not suit some couples. Preparation includes re-trimming stems, removing leaves, and placing blooms in water for 12 hours before freezing. The process usually takes about seven days, making it relatively quick compared to other methods.
DIY freeze drying is an option but may not be cost-effective unless you plan to use it for other items. Some flowers may not be suitable, so research beforehand is crucial. Despite the cost, freeze drying often yields stunning results, creating a beautiful and lasting keepsake.
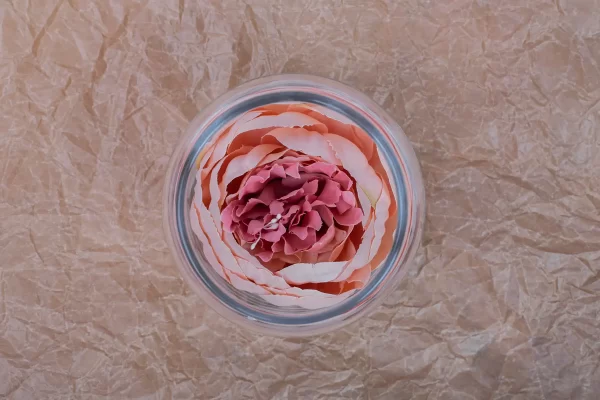
Resin Preservation for Wedding Flowers
Resin preservation is a creative and durable method. It involves drying the flowers and then coating them in resin, which removes moisture while maintaining shape and colour. This method allows for the creation of decorative pieces like jewellery, paperweights, coasters, and trinket trays.
If handling resin isn’t for you, consider sending your flowers to a specialist. Resin preservation encapsulates flowers in a hard material, ideal for creating unique, beautiful keepsakes that can be cherished for potentially a lifetime.

Wax Dipping for Temporary Preservation
Wax dipping offers short-term preservation, extending the lifespan of your wedding flowers for about six months while maintaining colour and shape. You’ll need paraffin wax, a saucepan, a large pan, and parchment paper.
Gently dip the flowers into melted paraffin wax to coat them thoroughly and then hang to dry. While temporary, wax dipping lets you enjoy your wedding flowers a bit longer, keeping their beauty intact for months after your special day.
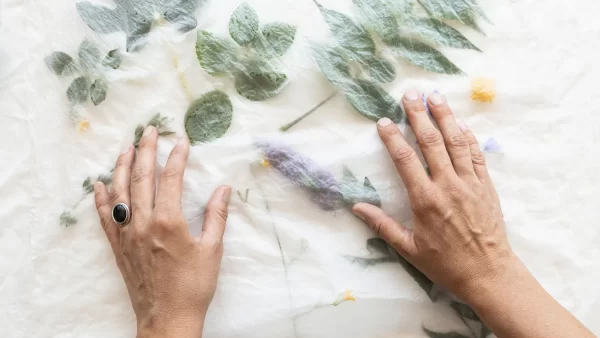
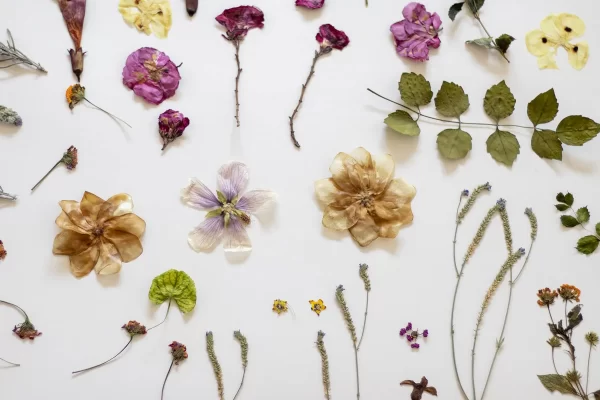
Pressing Wedding Flowers
Pressing flowers is an easy and accessible method, ideal for creating framed art or other flat keepsakes. Arrange the flowers on clean wax paper, place them between sheets of parchment paper, and apply weight for several days to ensure proper drying with a flower press. This technique is often referred to as flower pressing.
Pressing usually takes two to four weeks. Check periodically to prevent wilting and discolouration. Though resulting in flat flowers, this method offers a simple and beautiful way to preserve your wedding bouquet, turning it into a cherished piece of art.
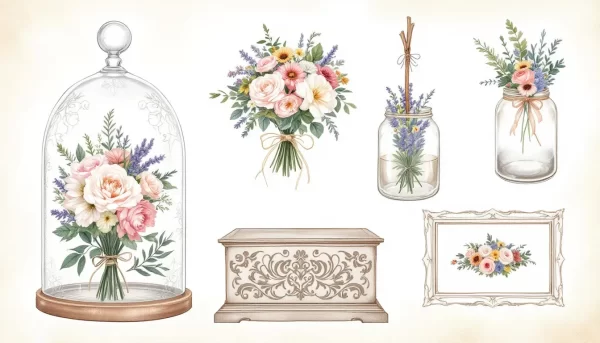
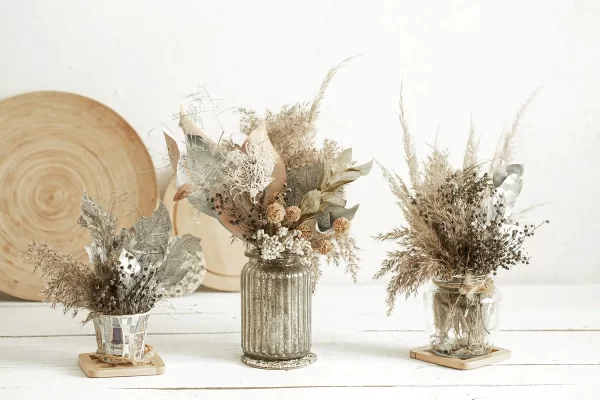
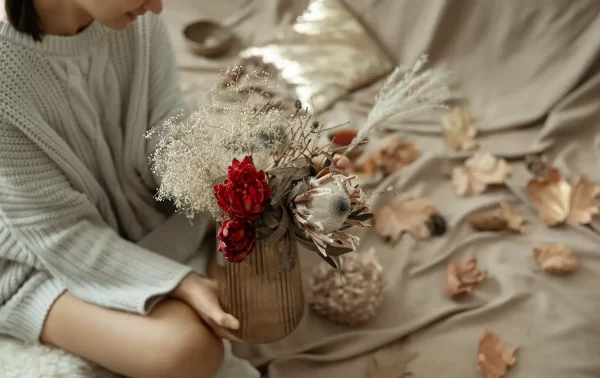
Creative Ways to Display Preserved Wedding Bouquets
After wedding bouquet preservation, there are various creative ways to display your newly preserved flowers. Options like shadow box frames, custom paintings, and decorative resin art can enhance your home décor and serve as a beautiful reminder of your wedding day.
Let’s explore some of the most popular options for showcasing your preserved bouquet.
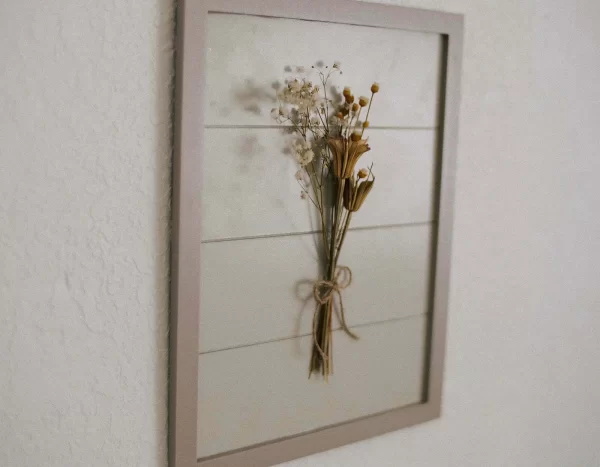
Shadow Box Frames
Shadow box frames are highly recommended for showing off your dried flowers preserved with silica gel or freeze drying. These bespoke frames create a 3D display of your bouquet’s original arrangement, often using special conservation glass to protect and highlight the dry flowers elegantly.
The framing process is delicate and requires precision for a beautiful final presentation. Typically taking 18-20 weeks, the result is a stunning keepsake that preserves the essence of your special day.
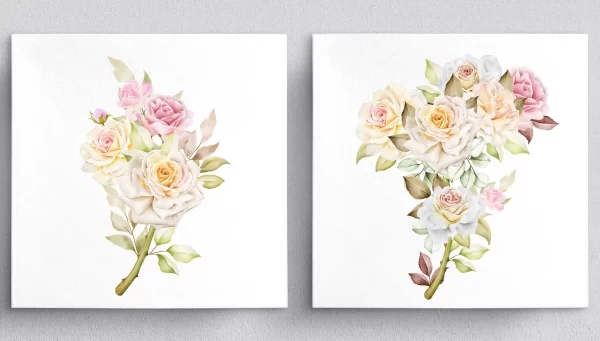
Custom Paintings
A personalised painting of your wedding bouquet uniquely captures the beauty of your flowers. Commissioning or creating a custom painting results in a beautiful piece of art that serves as a continual reminder of your wedding day.
Artists can use a small paint brush and high-quality materials to create stunning renderings, highlighting the intricate details and colours of your bouquet, resulting in a precious keepsake with sentimental value.
Decorative Resin Art
Resin art uniquely incorporates preserved wedding flowers into stunning pieces of art. By embedding flowers in clear epoxy resin, you can create durable pieces like coasters, jewellery, and decorative frames.
This method preserves the flowers’ beauty while transforming them into artistic designs that can be cherished for years.
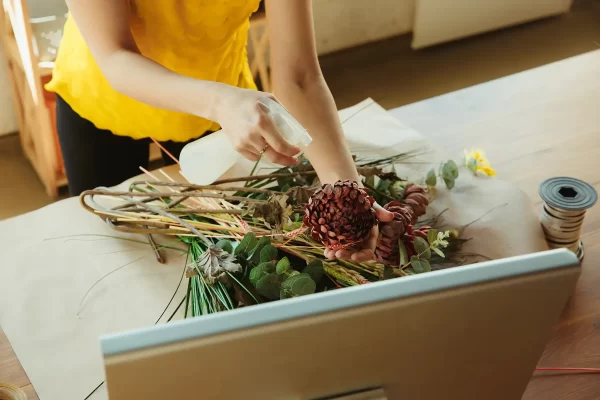
Preparing Your Flowers For Wedding Bouquet Preservation
Act quick! For the best results, prepare the flowers as soon as possible after the wedding while they are still vibrant, ideally within a day or two. Delegating the task to a friend or wedding party member can relieve the bride from immediate responsibilities, ensuring proper preparation.
Disassembling the bouquet allows for better preservation, as most methods require individual flowers. Remove any damaged petals and stems to maintain the bouquet’s overall appearance. Proper preparation sets the stage for successful preservation, resulting in a beautiful keepsake.
Why Would You Preserve Your Wedding Bouquet
Wedding bouquet preservation lets you relive the emotions of your wedding day whenever you see it. Flowers symbolise deep emotions like love and gratitude, and preserving them extends their significance. A preserved bouquet offers a lasting physical reminder of the joy and love from your special day.
Preservation also contributes to environmental sustainability by reducing the demand for fresh flowers, thereby minimising environmental impact and waste. Be it through DIY methods or professional services, preserving your bouquet offers both sentimental and environmental benefits, creating a timeless reminder.

Choosing the Right Flower Preservation Service
Choosing the right flower preservation service is crucial for achieving the best results. Consider the experience and expertise of the service provider. For instance, The Flower Preservation Studio’s 19 years in the industry speaks volumes about their reliability and skill.
Inquire about the artist’s approach to colour correction, as flowers can change colour during preservation. Request examples of both fresh and preserved flowers to evaluate their techniques. Also, ask about pricing variances based on the size of the final framed piece to ensure it fits within your budget.
Carefully selecting a preservation service ensures your precious flowers are preserved beautifully and professionally.
DIY Flower Preservation Kits
DIY flower preservation kits offer a convenient way to preserve your whole bouquet at home. These kits typically include materials and detailed instructions for preserving flowers, making the process accessible even for beginners. Using a flower preservation kit involves drying the flowers and placing them in a container with a drying agent, which removes moisture from the flowers while preserving their colour and shape.
Following the kit instructions carefully is essential to achieve the best results in preserving the flowers. DIY kits provide a cost-effective and personal way to keep your bridal bouquet as a lasting memento, allowing you to enjoy the process of preserving your special wedding flowers at home.
Frequently Asked Questions
How soon should I start preserving my wedding bouquet?
You should definitely start preserving your wedding bouquet within a day or two after your big day while those beautiful wedding flowers are still vibrant! This way, you can keep those precious memories alive for years to come!
What is the most cost-effective method for preserving my bouquet?
The most cost-effective way to preserve your bouquet is to use DIY methods like air drying or silica gel! These techniques save you money while keeping your wedding flowers looking beautiful!
How long does the freeze drying bouquet preservation process take?
The freeze drying process usually takes about seven days! Isn’t it amazing how much time and effort goes into preserving our favourite foods? The same applies for bridal bouquet preservation!
Can I preserve my entire bouquet or just individual flowers?
Absolutely, you can preserve your entire bouquet or just individual flowers! It all depends on your preference and the method you choose—how exciting is that?
What are some creative ways to display my preserved bridal bouquet?
You can beautifully showcase your preserved bridal bouquet in shadow box frames, custom artwork, or even as stunning decorative resin art! These options add a personal touch and keep those cherished memories alive!
Can preserved flowers die?
Properly preserved wedding flowers can last from 1 year to a lifetime, depending on the method: air-dried (1-2 years), silica gel (around 5 years), freeze-dried (5-10 years), and resin-preserved (potentially forever with care).
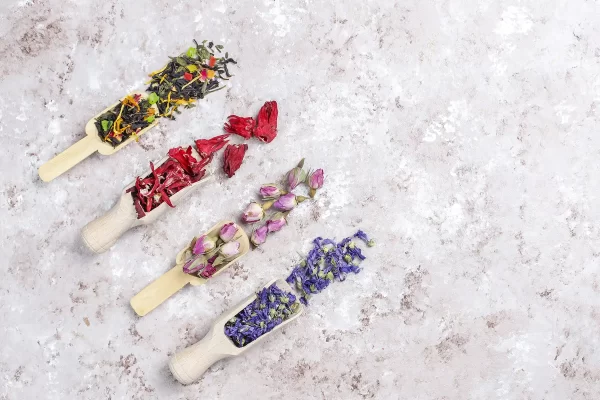
What type of flowers preserve the best?
Sturdy flowers like roses, hydrangeas, lavender, and strawflowers preserve best, while delicate, high-moisture flowers like tulips and lilies are harder to preserve.
Conclusion
Preserving your bridal bouquet is a wonderful way to keep the memories of your special day alive. Regardless if you choose DIY flower preservation methods like air drying and silica gel or opt for expert services like freeze drying and resin preservation, each method offers unique benefits and outcomes. Preparing your bouquet properly and selecting the right preservation service can ensure that your flowers remain a beautiful reminder of your wedding day.
By exploring creative ways to display your preserved bouquet, you can incorporate your flowers into your home décor and enjoy them for much longer than just your wedding day. Cherish your wedding memories by preserving your precious flowers.